

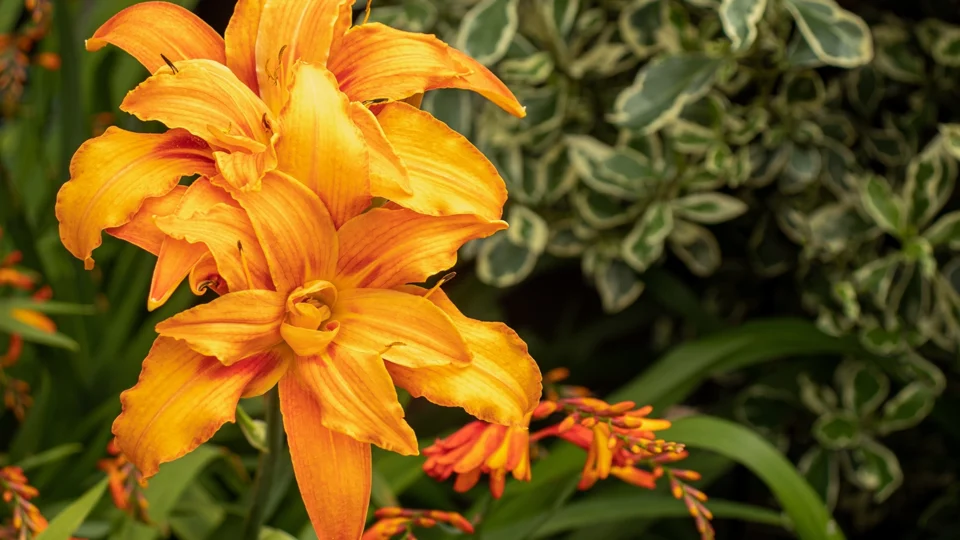
Daylilies are among the toughest and most rewarding perennials in the garden, prized for their longevity, adaptability, and profusion of bloom. Gardeners of all levels grow them, and with good reason: they establish reliably, tolerate a wide range of conditions, and complement many planting schemes. Yet even experienced growers sometimes fall into predictable traps that can limit how well these plants perform. Before exploring each of the five common mistakes, it’s useful to consider expert practical advice.
According to the premier grower of daylily plants at Swallowtail Daylilies, careful planning of planting location and soil preparation often makes more difference to a daylily’s long-term success than any secret feeding regime. Growers will benefit from choosing robust cultivars that suit their garden conditions, as highlighted in the range of daylily plants for sale. Swallowtail’s experience shows that many problems often stem from cultural choices rather than pests or disease.
This article examines mistakes relating to site selection, spacing and planting, soil preparation, irrigation and feeding, and maintenance of aged clumps. Covering these issues in depth will help gardeners refine their approach and get the best from their daylilies in beds, borders, and mixed plantings.
Choosing an Unsuitable Site
One of the most persistent mistakes even knowledgeable gardeners make with daylilies is choosing inappropriate sites for planting. Daylilies are hardy and adaptable, but they still have preferences that maximise bloom and overall health. A poorly chosen location can significantly reduce flowering, stunt growth, and make plants more susceptible to weeds, pests, and seasonal stress.
Daylilies thrive in a position that receives good sunlight for the majority of the day. While they can tolerate part shade, especially in hotter regions, insufficient light considerably diminishes bud formation and overall vigour. In gardens with heavy shade from large trees or buildings, plants may produce lush foliage but few flowers, which is one of the most common frustrations reported by gardeners. Putting daylilies in deep shade because there’s “space to fill” often leads to disappointment.
Equally, situating plants where they are exposed to harsh afternoon sun with no respite can cause mild leaf scorch and increased water stress. The ideal is a location that captures morning sunlight with filtered light in the warmer parts of the day, particularly in southern UK and similar climates. This encourages a longer season of bloom and stronger bud sets.
Soil conditions matter as much as light exposure. Although daylilies tolerate a range of soil types, they perform best in a free-draining, fertile medium. Heavy clay that becomes waterlogged in winter invites rot at the crown, whereas very sandy soils may lack sufficient water retention through dry spells. Experience shows that suboptimal site choices result in slower establishment, uneven flowering, or weak increase of clumps over time.
Gardeners should assess their site carefully several months before planting, taking note of sun patterns, soil texture, and competition from established plants. Simple tests like digging a soil profile and observing moisture behaviour after rain can inform decisions about site amendments or choosing more tolerant varieties.
In summary, unsuitable site selection remains a common and significant error. When garden planning is mindful of light and soil conditions, daylilies will reward with regular, generous blooms season after season.
Inadequate Spacing and Planting Techniques
Spacing and the way daylilies are planted also frequently cause issues, especially when gardeners rely on assumptions or past habits rather than the distinct characteristics of each variety. Daylilies spread by clump division and can dominate a bed if crowded. Packing plants too closely can restrict air flow and increase competition for moisture and nutrients. While a tight planting may look lush in year one, it can lead to weaker performance in subsequent seasons.
The recommended spacing for most daylily cultivars is around 45–60 cm between plants, depending on the mature leaf spread. Larger or more vigorous varieties may need wider spacing to avoid crowding, whereas smaller cultivars or miniatures can be a little closer together. Spacing that allows light and air to penetrate through the planting helps minimise fungal issues and encourages steadier growth.
Planting depth and root positioning further influence how quickly plants establish. A common mistake is to plant daylilies either too deep or too shallow. The crown — where the roots meet the foliage — should be placed slightly below the soil surface, with roots spread naturally into the planting hole. Too deep a planting can smother new shoots in spring, while too shallow a positioning may leave roots exposed, risking desiccation.
Experienced gardeners may also forget to firm the soil around the roots sufficiently during planting. Lightly firming ensures good contact between roots and soil, reducing air pockets that could dry out roots or encourage poor establishment. Watering in thoroughly after planting aids this process and settles the soil around the plant.
Incorrect spacing and planting are easy to overlook when bulbs or plants are numerous, but investing effort here pays dividends in a stronger, healthier garden stand over time. Proper planning, including sketching out the bed layout and considering future growth habits of chosen cultivars, can reduce the need for early division or unscheduled replanting.
Ignoring Soil Preparation and Amendments
Another frequent mistake — and one that often differentiates good gardens from mediocre ones — is overlooking soil preparation before planting. Soil is the foundation of plant health, yet gardeners sometimes skip testing or improving the growing medium. Daylilies tolerate a range of soils but establish and flower best in fertile, well-drained conditions.
Before planting, test soil texture and nutrient levels. Basic soil pH tests and a simple assessment of nutrient status will show if lime or organic matter is needed. Daylilies prefer a slightly acidic to neutral soil (pH 6.0–7.0) and benefit from rich organic matter that enhances water retention without creating a boggy environment. Incorporating well-rotted compost or garden loam into the planting area ensures a beneficial start.
Avoid relying solely on standard topsoil in areas that pit against clay, sand, or compacted subsoil. Heavy clay soils restrict root expansion and drainage, while high sand content may drain too quickly and stress plants in dry spells. Amending both types with generous organic matter gradually balances moisture behaviour and improves structure.
Experienced gardeners might apply fertilisers inconsistently, either too strong or at inappropriate times. Balanced fertilisers applied in spring just as growth begins are more effective than random feeding. Avoid high nitrogen formulations that encourage leafy growth at the expense of blooms. Instead, look for products or soil mixes designed for perennial flowering plants.
Mulching is also a part of soil preparation and care. Applying a mulch layer after planting helps suppress weeds and maintain soil moisture, but it should be kept away from direct contact with the plant crown to prevent rot and pest problems.
Soil preparation isn’t glamorous or quick, but it pays off every year with stronger growth, deeper root systems, and more abundant flowering. Gardening success stories are often built on this essential preparation step rather than cosmetic maintenance alone.
Mismanaging Water and Nutrient Regimes
Watering and feeding mistakes are common across all garden plants, and daylilies are no exception. Their hardy reputation can mislead gardeners into thinking they require minimal care once established. In reality, how they are watered and fed through their growth cycle influences overall health and flowering.
Daylilies in well-prepared soil generally cope well with average rainfall, but extended dry periods stress the plant and reduce bloom production. Watering deeply and infrequently encourages deeper root growth, which improves drought tolerance. Frequent light watering keeps roots near the surface and can make plants more susceptible to heat and dry conditions. Apply water that soaks the planting zone to a depth of 20–30 cm, encouraging roots to explore the soil more fully.
Experienced gardeners sometimes over-water container-grown daylilies or install irrigation schedules suited to thirstier plants like vegetables. It’s important to adjust regimes based on soil type: sandy soils may need more frequent moisture topping up, while heavier soils retain moisture longer. Using simple tools like a soil probe or finger test will quickly show if moisture has penetrated into the root zone.
Feeding is similarly nuanced. A balanced, slow-release fertiliser applied after flowering helps plants recover and build reserves for the next season. Some gardeners mistakenly apply fertiliser too late in the season, stimulating fresh growth just when plants should be winding down, increasing risk from frost or winter wet. Follow feed manufacturer recommendations and consider organic matter replenishment through mulching.
Pay attention to the specific watering needs of newly planted daylilies versus established clumps. Young transplants require more consistent moisture to establish, while mature plants benefit from deeper but less frequent irrigation.
Effective water and nutrient management enhance resilience, reduce stress, and encourage repeat flowering — especially important in British climates where autumn and spring rains can be unpredictable.
Neglecting Clump Renewal and Maintenance
Even experienced gardeners sometimes leave daylily clumps undisturbed for too long. Over years, clumps expand, centre growth may weaken, and flowering becomes concentrated on the outside edges. Renovation through division maintains vigour and prevents crowding that increases disease risk and reduces bloom quality.
The best time to divide daylilies in cooler UK climates is late summer to early autumn, when plants have finished peak flowering and before the onset of winter. Carefully lift clumps, tease apart rooted sections, and replant healthy divisions with adequate spacing. Dispose of or rehome weak or spindly pieces.
Neglecting this maintenance step can leave gardens with dense clumps that underperform, with thin foliage and few flowers. This is particularly noticeable in traditional mixed borders where daylilies were established decades ago and rarely lifted. Annual or biennial inspection and division ensure the garden remains productive.
Regular maintenance also includes removing dead foliage, checking for pests like aphids, and cleaning up spent blooms to prevent seed formation. While daylilies are low-maintenance compared with many perennials, ignoring these tasks weakens their long-term performance.
Conclusion
Daylilies remain one of the most reliable and rewarding plants for perennial borders, cottage gardens, and mixed plantings. However, even experienced gardeners can undermine their potential by repeating common mistakes. Careful choice of site, proper spacing and planting techniques, thoughtful soil preparation, sound water and nutrient management, and timely clump renewal all contribute to vigorous growth and abundant flowering year after year.
By addressing these five key areas, gardeners will significantly improve the health and appearance of their daylilies without resorting to undue complexity. Choosing appropriate cultivars, informed by reputable sources and growers, and tending the plants with care through their seasonal rhythms ensures strong performance and long garden life.
This approach, grounded in horticultural practice rather than assumption, helps these magnificent perennials thrive in gardens across the UK and beyond. For gardeners looking to expand their collection or learn more about reliable varieties, resources such as Swallowtail Daylilies offer a wide selection of daylily plants for sale and practical growing insights.